Showing posts with label add. Show all posts
Showing posts with label add. Show all posts
Saturday, January 7, 2017
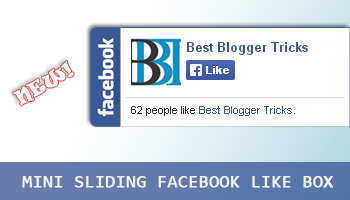
Add Mini Sliding Facebook Like Box For Blogger Blog By Masti Computer
Add Mini Sliding Facebook Like Box For Blogger Blog By Masti Computer

Are you looking for a way to promote your Facebook fan page received?Today I give you one piece to increase your Facebook likes.Statistics add Facebook like box perched on your blog or website.Widget remain in a constant on the right side of your website mode.When you hover over the blue s Facebook like box will then dragAnd be using jQuery. As you know, required social media back contactTo increase page rank and maintain the health of the site. So keep in mind that I put thisPiece and Im sure it will increase Facebook likes. Ive shared a floatingFacebook like Facebook fund such as Popup Fund and widgets for blogger swamp,but I flattererSharing a miniature version of Facebook, such as a floating box. Im sure you will like it!.Add Mini Sliding Facebook Like Box For Blogger Blog By Masti Computer.
Add Mini Sliding Facebook Like Box For Blogger Blog?
Follows Steps.
1 : Login to Blogger Account.
2 :Go to Layout Tab.
 |
| Step -1: |
3 : Click on Add a Gadget.
 |
| Step-2: |
4 : Then Scroll down and select widget type as HTML/JavaScript.
5 :Paste the following Code inside it.
 |
| Step-3: |
<script type="text/javascript">
//<!--
$(document).ready(function() {$(".bbtmini").hover(function() {$(this).stop().animate({right: "0"}, "medium");}, function() {$(this).stop().animate({right: "-250"}, "medium");}, 500);});
//-->
</script>
<style type="text/css">
.bbtmini{background: url("https://blogger.googleusercontent.com/img/b/R29vZ2xl/AVvXsEjvX38Sf2gv3jFc_GrqG5xW_cnGlT09sTQ_jIvvni3nwxrYL1cwJxQd13FBMbnUzpeVU9I6CDfDeG04-HWyclLBh6xFaiCgMxb5KwZAniyU2k2vPvakeiInWSiDIfrQzmx6F5DejhvyzUtm/s1600/FB-sliding-widgets-HTD-100px.png") no-repeat scroll left center transparent !important;display: block;float: right;height: 100px;padding: 0 5px 0 30px;width: 245px;z-index: 99999;position:fixed;right:-250px;top:20%;}
.bbtmini div{border:none;position:relative;display:block;}
.bbtmini span{bottom: 12px;font: 8px "lucida grande",tahoma,verdana,arial,sans-serif;position: absolute;right: 6px;text-align: right;z-index: 99999;}
.bbtmini span a{color: #808080;text-decoration:none;}
.bbtmini span a:hover{text-decoration:underline;}
</style>
<div class="bbtmini" style="right: -250px;">
<div>
<iframe src="http://www.facebook.com/plugins/likebox.php?href=http%3A%2F%2Ffacebook.com%2FMastiComputer&width=230&colorscheme=light&show_faces=true& connections=9&stream=false&header=false&height=100" scrolling="no" frameborder="0" style="border: medium none; overflow: hidden; height: 100px; width: 230px;background:#fff;"></iframe>
</div>
</div>
6 :Just replace MastiComputer with your Facebook username.
7:Hit Save Button and View Blog.
Go to link Download
Thursday, December 15, 2016
Add All in One Social Media Subscription Widget in Blogger Blog By MastiComputer
Add All in One Social Media Subscription Widget in Blogger Blog By MastiComputer

Social media is a superpower now a days in all areas. Every webmaster wants to engage more People from social networking sites to blog. Many of widgets and social media have common Blogger, but today I share amazing Subscribe and Social fine large square piece Blogger. The rotation includes social media Buttons, Google Plus profile badges, and Feed Burner subscription box. Even today I write about adding Article All in one subscription and social media Widget in Blogger Blog.I share email amazing and beautiful subscribe key social networks Widget for Blogger blog. In this article,You will come to know that how Add a subscription and social capital Below the other network addresses buttons Blog blogger.
Step-1: Login to "Blogger Dashboard".
Step-2: Go to "Layout" Tab.
Step-3: Click on "Add a Gadget " Option.
Step-4: Then "Select HTML/Javascript" Widget.
Step-5: Paste the Following Code inside it.
Step-6: Then Click on "Save" Button and Enjoy.
<style>
.bbt-All-In-1-email-field {
background: #fff url(https://blogger.googleusercontent.com/img/b/R29vZ2xl/AVvXsEijy-edYmHixRFssVB9kstHV-d-FnBSEHXVUar0V6rYeG7R_5H0jAyoYaM3id_aptc3RR7DdJtyt8FTFoHlZ6qdI-v8nDyiXVQJsw-ZVTw1RJmg3fQVyHYaQOTNwgrHMxZQZwG7HOdO43Sr/s1600/sprites.png) no-repeat 0 -28px;
width: 238px;
float: left;
color: #777;
margin: 7px 0 7px 0;
padding: 10px 30px;
border: 1px solid #ccc;
border-radius: 4px;
-moz-border-radius: 4px;
-webkit-border-radius: 4px;
}
.bbt-All-In-1-email-button {
background: #3C8CD6;
width: 300px;
float: left;
color: #fff;
font-family: Verdana, Arial;
font-size: 16px;
font-weight: bold;
padding: 10px;
-webkit-transition: all .3s ease-in-out;
-moz-transition: all .3s ease-in-out;
-o-transition: all .3s ease-in-out;
-ms-transition: all .3s ease-in-out;
transition: all .3s ease-in-out;
text-transform: small-caps;
}
.bbt-All-In-1-email-button:hover {
background: #303030;
}
</style>
<style>
#wc-wplike
{
background:#ffffff;
border:1px solid #dcdcdc;
padding:5px;
box-shadow:1px 1px 4px #dcdcdc;
-moz-box-shadow:1px 1px 4px #dcdcdc;
-web-kit-box-shadow:1px 1px 4px #dcdcdc;
-goog-ms-box-shadow:1px 1px 4px #dcdcdc;A
width:285px;
}
#wc-wplike td
{
font:16px georgia;
text-align:center;
color:#444444;
}
#wc-wplike img{
-moz-transition: all 1s ease-in-out;
-webkit-transition: all 1s ease-in-out;
-o-transition: all 1s ease-in-out;
-ms-transition: all 1s ease-in-out;
transition: all 1s ease-in-out;
}
#wc-wplike img:hover{
-moz-transform: rotate(180deg);
-webkit-transform: rotate(180deg);
-o-transform: rotate(180deg);
-ms-transform: rotate(180deg);
transform: rotate(180deg);
}
#first-img,#sec-img
{
border-right:1px solid #dcdcdc;
}
</style>
<div id="wc-wplike">
<table border="0" cellspacing="0" cellpadding="1" width="298">
<tbody>
<tr>
<td id=first-img valign="top" width="74"><a href=http://www.facebook.com/MastiComputer.tk target=_blank rel="nofollow">
<img border="0" src="http://1.bp.blogspot.com/-XtMSvGt9QbM/UiIRj_Z-xkI/AAAAAAAACUE/lxKPo9uepx4/s1600/facebook.png" /></a></td>
<td id=sec-img valign="top" width="74"><a href=https://twitter.com/MastiComputer1 target=_blank rel="nofollow">
<img border="0" src="http://1.bp.blogspot.com/-TD3jCs_IZcg/UiIRjnuFRyI/AAAAAAAACUA/9ZYp0awI3Ss/s1600/twitter.png" /></a></td>
<td valign="top" width="74"><a href=http://feeds.feedburner.com/MastiComputer target=_blank rel="nofollow">
<img border="0" src="http://2.bp.blogspot.com/-IXJ5WpaZllc/UiIRkBdgE0I/AAAAAAAACUQ/H41RlpEwkSU/s1600/rss.png" /></a></td>
<tr>
<td valign="top" width="74">11K</td>
<td valign="top" width="74">500+</td>
<td valign="top" width="74">900+</td>
</tr>
<tr>
<td valign="top" width="74">Fans</td>
<td valign="top" width="74">Followers</td>
<td valign="top" width="74">Subscribers</td>
</tr></tr></tbody></table>
</div>
<!-- Google plus Badge Start-->
<div style=background: #FFFFFF; float: left; margin: 10px 0 10px 0px;>
<div class="g-person" data-width="300" data-height="70" data-href="//plus.google.com/+MastiComputer" data-layout="landscape" data-rel="author"></div>
</div>
<!-- Google plus Badge end-->
<div class="g-page" data-width="300" data-height="70" data-href="https://plus.google.com/106118947222415942478" data-layout="landscape"></div>
<!-- Email Subscription Start-->
<center>
<div class="bbt-All-In-1-form">
<form action="http://feedburner.google.com/fb/a/mailverify?uri=MastiComputer" class="bbt-All-In-1-form" method="post" onsubmit="window.open(http://feedburner.google.com/fb/a/mailverify?uri=MastiComputer, popupwindow, scrollbars=yes,width=550,height=520);return true" target="popupwindow"><input name="uri" type="hidden" value="MastiComputer" /><input name="loc" type="hidden" value="en_US" /><input class="bbt-All-In-1-email-field" name="email" autocomplete="off" onblur="if (this.value == ) {this.value = Enter your email address;}" onfocus="if (this.value == Enter your email address)
{this.value = ;}" value="Enter your email address"/><input class="bbt-All-In-1-email-button" title="" type="submit" value="Subscribe Now !" /></form></div>
</center>
<!-- Email Subscription End-->
Go to link Download
Subscribe to:
Posts (Atom)