Showing posts with label import. Show all posts
Showing posts with label import. Show all posts
Tuesday, April 25, 2017
How to backup Import Microsoft Outlook Mail
How to backup Import Microsoft Outlook Mail

How to backup/Import Microsoft Outlook Mail
Hello friend! How are you? I hope you are very well. Today I am going to show you how to export and import your Microsoft 2010 and 2013 outlook mail (.pst) in your hard drive. If you use Microsoft outlook 2010 or 2013 and if you want to backup or import your mail, you must follow my bellow procedures.
So please letÕs see how to backup or import Microsoft outlook emails.
How to Backup Microsoft outlook 2010/2013 mail?
Open Microsoft outlook. From the left side click on ÒFILEÓmenu. Click ÒOptionsÓ ˆfrom the options window click ÒAdvancedÓ. From the right side click ÒExportÓbutton. Now will open a new wizard which name is ÒImport and Export WizardÓ, from this wizard select ÒExport to a fileÓ then click next. Now select ÒOutlook Data file (.pst)Ó then click ÒNextÓ. Click Next. Now this wizard give you three options, carefully read this three options and select one option which one you want. Personally I select ÒReplace duplicates with items exportedÓ. Now click on ÒBrowseÓbutton and give a location where you want to save your mail. After this click Finishbutton and click Ok. Now it will take sometimes and please wait until finishing this process. After completing this process you work is finished.
How to Import Microsoft outlook 2010/2013 mail?
Open Microsoft outlook. From the left side click on ÒFILEÓmenu. Click ÒOptionsÓ ˆfrom the options window click ÒAdvancedÓ. From the right side click ÒExportÓbutton. Now will open a new wizard which name is ÒImport and Export WizardÓ, from this wizard select ÒImport from another program or fileÓthen click next. Now select ÒOutlook Data file (.pst)Ó then click ÒNextÓ. Now this wizard give you three options, carefully read this three options and select one option which one you want. Personally I select ÒReplace duplicates with items exportedÓ. Now click on ÒBrowseÓbutton and select your outlook (.pst) file and then click Open, which one before you backup. After this click Next and then Finish. Now it will take sometimes and please wait until finishing this process. After completing this process you work is finished.
Thanks to all of my friends. If you think this article is helpful, please share this article with your friends and any social media.
Md. Manjurul Islam (Rubel)
My Facebook, Youtube,
You may like also....
How To Enable .Net Framework On Windows 8/8.1
Solved HP Probook 440/450 G2 Fingerprint Problem
How To Solve Dell Vostro 5470 Fingerprint Problem
How To Install Microsoft .NET Framework On Windows 7
Go to link Download
Wednesday, April 19, 2017
How to Import External Data into Access 2013 App or Desktop Database
How to Import External Data into Access 2013 App or Desktop Database
While you want Access database referring to your important excel file, the introduction about importing external data into Access 2013 App or desktop database in this passage would tell you how to do. So whether you have such a problem, go on to read.
- S1: Import external file into an Access 2013 app
- S2: Import external data into Access 2013 desktop database
S1: Import external file into an Access 2013 app
Available external file type: Excel workbooks, ODBC data sources, text/CSV files, SharePoint lists, and other Access databases.
Preparation: Access 2013 has been installed and opened on your computer and imported files have been prepared on computer or connected storage devices.
Step 1: On the Add Tables page, you can import data from Excel workbooks, ODBC data resources, text/CSV files, SharePoint lists, and other Access databases.
Tips: You can see Add Tables page when creating a new custom app. But if you have already started an app, open it in Access, then click Home - Table.
Step 2: Near the bottom of the Add Tables page, click the type of data source you want to import, and follow the instructions in the Get External Data wizard.
Tips: Imported data is always added to new table with default List and Datasheet views.
S2: Import external data into Access 2013 desktop database
Imported data can be added to existing table. And sometimes, when you couldnÕt import data directly into an app, you might be able to import it into a desktop database first, and then import desktop database table into the app.
For example: import external excel file into Access 2013 desktop database
For example: import external excel file into Access 2013 desktop database
Step 1: Open Access 2013. On the External Data tab, in the Import & Link group, click the file type you want to import.

Step 2: Follow the instructions in the Get External Data Wizard. For example, click "Browse" button next to "File name" box, to specify the source of the definition of the objects. Now we choose to import Excel file.

Step 3: Follow "Import Spreadsheet Wizard" to do.
 |
| 3-1 Choose Show Worksheet you like and click Next |
 |
| 3-2 Check "First Row Contains Column Headings" and click Next |
 |
| 3-3 Set "Field Name" and "Data Type" |
 |
| 3-4 Set datasheet primary key |
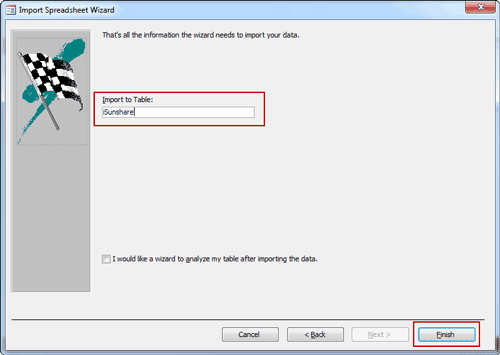 |
| 3-5 Set a name for imported Excel file in Access and click Finish |
 |
| 3-6 Exit "Import Spreadsheet Wizard" |
 |
| or Save Excel import steps |
Step 4: External Excel file has been successfully imported into Access 2013.

Summary:
The beginning of importing different external data into Access is the same. But it would be different after you choose the file type you want to import. For example, if you want to import SQL database into Access database, it would be more complex than importing Excel or access database file into Access.
Related Articles:
Related Articles:
- 3 Ways to Create Access 2007-2013 Database
- How to Encrypt and Decrypt Access Database
- How to Access Locked Access 2013 Database
- Access Database Password Reset
- What Errors Lead to Access DataImport from Excel or Export Failure
Go to link Download
Sunday, March 5, 2017
How to Import Existing Access or SQL Database into Access
How to Import Existing Access or SQL Database into Access
SQL Server and Access are undoubtedly two important database services. So import and export data between them are usual. In this passage, we will mainly talk about something about data import, for example, how to import access or sql database into Access.
- Part 1: Import existing access database into new Access database
- Part 2: Import SQL database into Access
Part 1: Import existing access database into new Access database
When you are using database in Microsoft Access 2000/2002/2003/2007/2010/2013 etc, you can import tables, queries, and macros from that database into a Microsoft Office Access 2007/2010/2013 database (.accdb). We also can say import data from MDB database file into ACCDB database file.
Step 1: Click the Microsoft Office button, and then click Open.
Step 2: In the Open dialog box, select and open the access database that you want to import the tables, queries, or macros into.

Step 3: On the External Data tab, in the Import or Import & Link group, click Access.

Step 4: Click Browsebutton to specify the source of access database in Get External Data window. Click OK.

Step 5: In Import Objects window, tab Tables, Queries, Forms, Reports, Macros and Modules. Select what you want to import into opening access database. Then click OK.

To make additional settings, click Options to specify them.
Step 6: You will instantly get a message "All objects were imported successfully".

Click Close directly or check "Save import steps" to save the process of importing access database into Access database. So you can follow the import steps to import data more quickly when you want to import access database again.
After that, you can open and edit import datasheet now in current access database.

After that, you can open and edit import datasheet now in current access database.
Part 2: Import SQL database into Access
Besides access database, there is no doubt that SQL Server database data also can be imported into Access desktop database or Access apps. Now please see how to import sql database into Access desktop database.
Step 1: Open Access desktop database you want to import SQL database in Microsoft Access.
Step 2: On External Data tab, click ODBC Database.

Step 3: When you see "Get External Data" wizard, check "Import the source data into a new table in the current database". Click OK.

Step 4: In pop-up Select Data Source window, if you can find .dsn file, select the file in the list. If not, it will be necessary to create a new .dsn file.

Follow introductions show how to create a new DSN file in details.
1. Click New and go to Create New Data Source.
2. Select "SQL Server" in the driver list and click Next.

3. Type a name for .dsn file and click Browse to save the file in computer.

4. Click Next, review the data source information, then click Finish to complete creation wizard.

Then you can see a new dialog "Create a New Data Source to SQL Server". The "Description" is optional. But we have to set the SQL Server we want to connect to.

5. Type the SQL Server or select one from Server drop-down list. Click Next.
6. Confirm the authenticity of the SQL Server login ID.
7. If you want to connect to a specific database, ensure that the Change the default database to check box is selected. Then select the database that you want to work with, and then click Next.
8. Click Finish.
9. Review the summary information and click Test Data Source.
10. Review the test results, and then click OK to close the dialog box.
Step 5: Click OK to close the Select Data Source dialog box.
Step 6: In Import Objects dialog box, tab Tables, and click each table or view what you want to import into Access database. Click OK.
Step 7: If the Select Unique Record Identifier dialog box appears, select the field or combination of fields that is unique for each row, and then click OK. If you are not sure, contact to the administrator of SQL Server database.
Step 8: Click Close under Save Import Steps in the Get External Data - ODBC Database dialog box. Access finishes the import operation and displays the new table or tables in the Navigation Pane.
Or check "Save import steps". If you plan to repeat the import operation later, you can check it and easily rerun the same import steps later.
Related Articles:
Related Articles:
- How to Encrypt and Decrypt Access Database
- SQL Server Forgot SA Password
- How to Open Password Protected Access Database without Password
- Access Database Password Reset
Go to link Download
Sunday, February 26, 2017
What Errors Lead to Access Data Import from Excel or Export Failure
What Errors Lead to Access Data Import from Excel or Export Failure
 Even though data transfer between Access and Excel is usual now, errors are still occurring during data import or export. If you have tried to import data into Access from Excel or export data from Access database, believe you can understand it.
Now the following are some errors probably you would encounter during Access data import or export. Hope the solutions can give you a hand when you really meet Access import or export errors.
Error 1: Excel XLS cell data is over maximum limits
- Import Error: The wizard is unable to access information in the file <filename>. Please check that the file exists and is in correct format.
- Export Error: External table is not in the expected format.
This is an error during Access import/export to Excel XLS. Actually, the reason is that the Excel XLS file has cells containing more than 8224 bytes of data.
So, how to correct errors if you still want to import data from excel xls to Access or export data from Access to excel xls?
1. Use the *.xlsx format instead of *.xls.
2. Restrict any memo/long text fields to a length less than 8224 bytes.
3. When exporting, delete the existing .xls file before performing the export using the same file name.
4. Open the .xls file in Excel before performing the import/export from Access.
Error 2: Imported Excel file field is out of range
When I try to import data into a table of Access database, I am getting "Field "F42" Doesnt Exist in Destination Table" error. I have a "client lists" table, and I am trying to add additional records to it.
If you see this error, it is because your excel file field is out of range and the extra fields cannot be imported into Access database table.
Now you would have to give up something, so you can import Excel data into Access successfully. Here are some suggestions for you.
Solution 1: Go to Excel file and hit Ctrl + End to see whether it is much further than you expect. If it is, delete all extra rows and columns, save, and try again.
Solution 2: Name the range in Excel that you wish to import into Access. Then, as you are importing the file into Access, you can elect to import that named range instead of the whole sheet. That should ensure that you are only going to import what you want.
Solution 3: Delete all the extra columns and a lone variable in a distant cell. Then you can import data into Access.
Error 3: Too much rows are in Excel spreadsheet
When you are using Access data import wizard to import data from Excel spreadsheet, you receive this prompting message:
Not all of your data was successfully imported into Access. Errors descriptions with associated row numbers of bad records can be found in the Microsoft Access table <>.
Actually, this is far from unique. When you open ImportErrors table, you would find it is Type Conversion Failure. When Access scans the data in spreadsheet, row value in spreadsheet cannot be confirmed.
Whether we can make row value verified correctly? The answer is surely yes.
Because the value is stored in registry, so it can be easily changed. Then it can be confirmed when import spreadsheet into Access.
Now see how to change the registry key?
1. In Windows desktop computer or laptop, click Start and type regedit in search or Run box. Press Enter to display Registry Editor.
2. In the registry tree, select HKEY_LOCAL_MACHINE - Software - Microsoft - Office - 15.0* - Access Connectivity Engine - Engines.
Or if your Access is not the latest version, you would not navigate to HKEY_LOCAL_MACHINE - Software - Microsoft - Office - 15.0*, it would probably be Office - 14.

3. Double-click the Excel node.
4. In the right panel, double-click the TypeGuessRowsentry.
5. Change the value data to be 0.
6. Click OK.
7. Select File -Exit to exit the Registry Editor window.
After setting the registry key to 0, Access will now scan the entire spreadsheet. This registry change works effectively especially when you frequently import huge spreadsheets into Access databases. But not all of spreadsheet row value should be changed. You can obviously set this value to whatever number of rows makes sense for you.
Tips:
When importing data into an MS Access database, sometimes there are errors in the formatting of the data source. When this happens, MS Access will put the offending row into a separate table. In Access 2010, the file is called <name of import file>_ImportErrors. For example, importing try.txt, it would give try_ImportErrors.
Related Articles:
- How to Import Existing Access or SQL Database into Access
- How to Import External Data into Access 2013 App or Desktop Database
- 3 Ways to Create Access 2007-2013 Database
- How to Backup Access Database and Restore Data or Objects
Go to link Download
Subscribe to:
Posts (Atom)