Showing posts with label your. Show all posts

Saturday, May 13, 2017

Make Your Laptop Run Faster

Make Your Laptop Run Faster


There is nothing more frustrating than your computer locking up, freezing, or just being pokey, especially if the client is patiently waiting for the presentation or the paper is due.  Laptops are extremely accessible to everyone, yet if only the knowledge to keep them optimized was that easy to come by.   
These 10 tips are simple things you can do to make your laptop run faster.
  1.  Start with a disk cleanup.  There are several ways to access this, but one is to click on the Start Program>All Programs>Accessories>System Tools>Disk Cleanup.  This will allow you to delete temporary Internet Files, Offline Files, the recycling bin, and other types of unnecessary files. 
  2. Through the Control Panel, go to Internet Tools and delete cookies and history.  This can take several minutes if it hasnÕt been done in awhile.
  3. Disk Defragment.  You can access this the same way as a disk cleanup, but select disk defragmenter instead.  Many programs allow you to schedule a time to do this application, as it can take several minutes or several hours depending on how much work is to be done. 
  4. Malware or Spyware are big offenders of slowing down laptops.  Installing and running an anti-malware or anti-virus program and running it regularly will often times make a tremendous difference. 
  5. Check your power management by accessing the Control Panel.  Select power management and then Maximum or Best Performance.  If you use your battery pack rather than being plugged in it will drain quickly, but will give you optimal speed. 
  6. From the Control Panel, go to Add or Remove programs.  Remove programs that you know you are not using.  This can be a daunting task, since some programs affect others, and therefore you may want to know whatÕs important before you remove it.
  7. Check the memory usage of your computer.   You may need to add more random access memory (RAM) to store memory, rather than using disk space that is slower in all cases.
  8. Consider using registry software cleaner or repair program.  There are many good ones out there such as ccleaner.com or registryfix.com.  These will identify and repair problems within the registry.
  9. New computers that use Windows Vista can be slowed down by excess animation.  It is possible to turn it off by going to the Control Panel>System and Maintenance>Performance Information and Tools>Advanced Tools.  Then select Adjust the Appearance and Performance of Windows.  The Performance Options box will prompt, and if you select Custom, then uncheck Animate Windows when Maximazing and Minimizing.  You can consider other options as well, but this definitely pep it up.
  10. Use an external hard drive to store all music, photos and games.  It can be unplugged and used with multiple computers, and will save valuable space.
These ten tips are proven ways to get that computer moving and prevent untimely frustration.  By utilizing some or all, you will be optimizing your system and working efficiently.  

Article by : http://sumobackup.hubpages.com

Go to link Download

Read more »

How To Increase Your Android Mobiles Battery In Urdu

How To Increase Your Android Mobiles Battery In Urdu


How To Increase Your Android Mobiles Battery In Urdu


Go to link Download

Read more »

Wednesday, April 12, 2017

Protect your Documents Workbooks Presentations by Password !!

Protect your Documents Workbooks Presentations by Password !!


Protect your Documents, Workbooks and Presetations by Password


If  youre a regular visitor of Marks PC Solution you should notice, weve published lots of tutorials on Microsoft Windows, Microsoft Office and other software. Weve also published many tutorials and tips regarding security issues. You can find those tips by using the search box. Or you can search by categories: Tips n Tricks, Tutorials, Microsoft, Windows, Security etc.  Today, I would like to share another tips on security.


Many of you might be familiar with the password protection system of Microsoft Office. If youre working with highly confidential documents, workbooks and presentations (ie. Exam Questions, Online Account Information, Personal Information, Other Secret files),  then this is a good idea to encrypt those files by password.


But if you are not acquainted with the password protection system you should go through the whole post. You should know, the different versions of MS Office keeps the password option differently. You will not find it similar in Office 2003, 2007 and 2010. That could be difficult for you to find the password option. Thats why Im gonna discuss about all versions. :)

Note: The procedure is very similar in MS Word, Excel and PowerPoint.


Setting Password in MS Office Documents


Office XP and 2003:

These two versions are almost similar. All the options and tools are located at the same place. Maybe they are different just by color! Lets start -

Open MS Office Document (Word/ Excel/ PowerPoint) > Go to Tools Menu > Select Options > Hit on the Security Tab > Type your Password on Password to Open Box > Hit OK > Save the Document.

Now whenever you will open the document, first you have to enter the password. Then you will be able to access the file.

I apologize for not sharing any image. I dont use 2003 anymore. I have been using Office 2010 for last two years. But this is very easy. You will have no problem to set password in Office 2003. Upgrade to Office 2010 or 2013 to enjoy exiting features!


Office 2007:

You know Office 2007 brings a dramatic change in the interface. Its ribbon interface is absolutely different from Office 2003 or XP. But Office 2010 and 2007 are almost similar except small changes in few options. Okay start -

Open any of the Office Programs (Word, Excel or PowerPoint) > Now hit on the Office button from the top left corner > Choose Prepare and then Select Encrypt Document > A small Password box will appear > Type the Password > Hit OK > and then Confirm it > Save the Document.

Look at the image below:


Office 2010:

Though Office 2007 and 2010 are very similar, but there are some significant changes in some of the options. A major change is the disappearance of the Office button. Instead of Office button, you will see the File button in 2010. See how to do -

Open either Word, Excel or PowerPoint file > Click on the File button from the upper-left corner > Choose Info > Hit on the Protect Document from Permission section > Choose Encrypt with Password > Type your desired Password in the box and hit OK > Type again to confirm it > OK > Save the Document.

You can take help of the image below:


Note: If you dont save the document after setting the password, then it will be removed automatically. Password will be enabled after saving the document. And remember, this password has no recovery options as you can do in Gmail, Yahoo or Facebook! So be careful!


Removing/ Changing the Password

Sometimes you may set a password for testing purpose only. For example you set password in a document that doesnt need password at all. And every time youre required to type it when accessing that file. Or maybe you want to change it. But when you try to remove or change that password you cant find any option to remove it. How disgusting!  :)

Well this is easier than you think! If you wanna change the password then repeat the whole process again until the password box appears. Then type a different password and save the document.

And if you would like to remove the password then just leave that box blank and save the document. Password will be removed. 


Hopefully this post will be helpful for you . . . :)

Go to link Download

Read more »

Monday, April 10, 2017

Hack Your Windows Password in Just 1 Minute

Hack Your Windows Password in Just 1 Minute


Hack Windows password without permission is illegal. However, to crack, resetir change on Windows password is definitely needed if you forgot password for your computer.

When forgetting a Windows password, people can easily figure out a way - reinstall the XP system. Actually, doing this is not smart since a large amount of data on your computer will be probably lost. Why you should take risk in losing data? Why not take other feasible ways to solve the same problem? Okay, this post will fully satisfy your needs - tell you how to crack Windows login password in just 1 minute without causing any data loss from the computer.

Hack Windows password - by removing forgotten Windows password with Windows Password Recovery Basic.
Windows Password Recovery Basic, as a professional third-party password recovery application, has successfully helped many Windows users solve the Windows 7/Vista/XP/2000/NT password forgotten problem. One of the functions of this application is supporting fast-speed recovery. With costing you less than 1 minute, you will regain access to your locked machine. Below are the detailed instructions on how to remove forgotten Windows password with this application in 1 minute.

Instructions:
Note: Things you will need: an accessible computer, an empty and writable CD or DVD.
  1. Download Windows Password Recovery Basic software.
  2. Install and launch this app to an accessible computer.
  3. Quickly burn a Windows password reset CD/DVD with Windows Password Recovery Basic and the prepared CD or DVD.
  4. Change BIOS settings for the target/locked computer with the burned and bootable Windows password reset CD/DVD.
  5. After finishing BIOS settings, the locked computer will reboots, at this time, you now can start to reset your forgotten password with the burned CD/DVD in less than 1 minute. 
In resetting Windows password with this method, you soon will be able to log in your computer without any password.

Hack Windows password - by changing forgotten Windows password with Windows Password Recovery Ultimate.
Windows Password Recovery Ultimate, another version of Ainorsoft Windows Password Recovery. Compared with the basic version, this ultimate version has a function to help users directly change forgotten password based on any Windows OS, such as Server 2008/2003/Win7/Vista/XP. Also, it can create a new Windows user account for any Windows OS.

Related Article: Hack Windows 7 Password
Crack Windows 7 Password

Source: http://www.blog.windowspasswordrecovery.net/hack-windows-password.html

Go to link Download

Read more »

Thursday, April 6, 2017

How to Put Ads on Your Blog

How to Put Ads on Your Blog


Related Posts Plugin for WordPress, Blogger...You put a lot of time and effort into your blog setting up the layout, the right template and style for you and your audience, and you are satisfied with the results.  You have even moved onto the next step by producing content for your blog on a regular basis.  So whats next?  It is time for you to incorporate ads into your blog. 
How will you do this?  Where will you put them?  How can you make sure they wont be overlooked?  These questions will be answered in this article. 


How do I put Ads on my Blog?

This process is a lot easier than you may think.  Before you put any ads on your blog, you will want to sign up with a couple of companies so that you will have access to these ads.  Which companies?  You may want to try signing up for a Google Adsense account.  It may take a couple of days for your account to be approved but once it is, all you have to do is to go into the layout feature of your blog and and select the "add a gadget" button and scroll down until you see Adsense and add it.  From this point ads will automatically be displayed on your blog.  This is assuming that your adsense account has already been approved and you are using the blogger format.  If you are using Wordpress or a website, you may have to manually get the code on your Google Adsense account using a copy and paste method to place ads on your blog.  You will select a size for your advertising, highlight the html code, and then click control or CTRL button  and the letter C on your keyboard at the same time.  Next you will go to your website and select the html feature and paste them wherever you want them to be displayed.  You can paste simply by selecting the control or CTRL button on your keyboard and the letter V at the same time. 

If your blog is on the Wordpress.com format, you will have to apply for a WordAds account.  This particular feature is only for  allowed for bloggers with moderate to high traffic.  If you are approved as a publisher, then you will be not be allowed to run Google advertising from Google Adsense but you can use third party ads from companies like Clickbank, Payperpost, Smorty, Clickhop, Cashrocks, and others.  If you are using Wordpress.org you can download and install a wordpress plugin for your blog called WP125  for 125x125 ads to be displayed on your blog without having to manually edit your template.  This plugin will save you a lot of time. 

For other third party advertising companies that you want displayed on Blogger, you will simply go to the layout of your blog, click on the "add a gadget" feature and scroll down until you see html/javascript and copy and paste the codes right in this section throughout your blog.  You can place them in the sidebars, under your heading, or anywhere else you see fit.

Where should I place ads on my blog?

If you have a few ads or companies in mind that you would like to promote on your blog or website, you may be wondering where exactly they should be placed.  It is recommended that they are generally above the fold, meaning they are placed above the halfway point on your page.  It is better to place them near the top of the page so that they will not be overlooked.  It is also very advisable that you place the ads near or around your content.  This is where your readers and visitors to your site will look, so you could place them there.  You can also place the ads in your content itself.  You could write a post about whatever product or products you are trying to promote and have them featured throughout your article by highlighting a certain word or phrase to with text ads instead of banner ads.  You could also do both banner advertising and text advertising. 

How to make sure my ads wont be overlooked?

This part can be somewhat tricky.  There are also a lot of factors into why you ads may be overlooked?  For example, how long are your readers staying on your blog.  If they are only there for a few short minutes, this could cause your ads to be overlooked.  The longer your readers stay on your blog, the more likely they will click on some of your ads or be enticed to do so.  How do you get your readers to stay on your blog longer?  Keep creating quality content.  You can also incorporate a free tool called Link Within that will have older related posts right underneath your current post in the form of a thumbnail where they can easily access the content.  Not only will this keep them engaged but it will bring more traffic to your blog or website over time as well.  Ultimately, the key is to try to generate some interest around what you are trying to promote by recommending it, using it yourself and writing a review on it, or any other creative ways you can think of.


Here are a few more tips to make sure your ads arent overlooked

After you have you mastered the technique of being able to put ads on your blog or website, it will take some adjustments and time to make sure that your ads will not be overlooked.  
  • I would advise that you periodically freshen up your ads and get new ones that offer specials, discounts, or promotions.  
  • Make sure that they are related to your content as well.  If you have a blog about cooking, Paula Deen, Martha Stewart, or Rachel Ray products may be good to promote on your site.  You will have a better click through rate, meaning your audience is more likely to click on that ad to read more about the product or service and even purchase it which will help you to earn more money.  
  • Try different types of ads as well.  In-line text, banner, in tag, in frame, etc.  Dont limit yourself to one type of advertising or one company to use for advertising.  This will give your audience a well-rounded selection of intriguing ads that they may respond to.  
Dont get frustrated if you do not see results right away.  It took me a couple of months before I even made a whole $5 from my blog.  But I still kept blogging anyway because I loved the idea of sharing things with others.  Just keep writing good content because the reality is, the more you do this, the more traffic you will generate.  You will always be rewarded ( in more ways than one) for having targeted traffic to your blog.

Go to link Download

Read more »

Sunday, March 12, 2017

Lock Your Computer Screen By Creating A Shortcut

Lock Your Computer Screen By Creating A Shortcut


Hello friend!

How are you? Hope you are very well. For locking the computer screen we use two options (logoff and sleep). Today I am going to show you an easy way how to lock your computer, creating by a shortcut.


Anyway if you want to know this tricks, please follow my proceduresÉÉ


Right click on your desktop --> From the New --> Click Shortcut. Now will open a new window like the bellow image.


Now type this code in the Òrundll32 user32.dll,LockWorkStationÓ then click next. Type the name of this shortcut (ItÕs not necessary, you can use default name) then click finish.


Your work is finished. Now double click on your created file and look your computer screen is locked.


Video Of  This Tutorial:


If you think this article is helpful for you please share with your friends.


Thanks to all of my friends,


Md. Manjurul Islam (Rubel)


You may like also.....
How to Protect Your Secret Files From Others
How To Create Password On Windows 8.1
How to backup/Import Microsoft Outlook Mail

Go to link Download

Read more »

Thursday, February 2, 2017

Useful Articles Shutdown Computer with Your Cell Phone

Useful Articles Shutdown Computer with Your Cell Phone


By ENGNR  FAWAD AHMED SAY THANKS IF U LIKE MY POST.


Using this method, a user can shutdown, restart, hibernate, etc. his or her computer, just by sending an email from his or her phone. love love 

To do this, all you will need is Microsoft Outlook which should come with Microsoft Office, which most people have. This will need to be on the computer wish you wish to shutdown.

So, this is how you do this:


1. First, you need the batch files to perform the Shutdown, Hibernate etc. You can write them down yourselves

2. open your note pad

and write lik this...

c:windowssystem32shutdown -s -f -t 00

and save it as shutdown.bat

3. Open up Microsoft Outlook. Make sure that you have already configured it for your email.Now we will need to make it so that Outlook checks your inbox about every minute (1 minute for testing time can be increased if a delayed shutdown is desired). You can do this by going to Tools: Options.

4. Then click the Mail Setup tab, and afterwards, the Send/Receive button.

5. Make sure that the Schedule an automatic send/receive every... box is checked, and set the number of minutes to 1. Now you may close all of these dialog boxes.

6. Now go to Tools: Rules and Alerts... Next click the options button in the upper right hand corner and press the Import Rules button.

7. Now select the shutdown.bat file ...whi u hv created ...

8. Now, when you send a message from your phone to your e-mail address with the subject shutdown or smsshutdown%%, your computer will shutdown.

Go to link Download

Read more »

Tuesday, January 31, 2017

How to Protect Your Secret Files From Others

How to Protect Your Secret Files From Others


Hello friend!

How are you? Hope you are very well. Everyone have some privacy, have some secret files or important files or documents. We donÕt want to share them with anyone. So we need to protect that files/documents. For this reason we search a powerful software which can protect our secret files.


Today I am going to show you how to protect your documents by protecting your hard drive, without any third-party software. For this procedure you must install windows 7/8 or 8.1.

Anyway if you want to protect your files by protecting your hard drive, please follow my bellow procedures.


Double click on my computer--> Right click on any drive (Which one you want to protect) --> Click Turn on BitLocker --> Now will open a new window which name is BitLocker Drive Encryption. Check on Use a password to unlock the drive--> now enter your password in the Enter your password box and conform your password in the Reenter your passwordbox. Now this window give you three options.
  1. Save to your Microsoft account.
  2. Save to a file.
  3. Print the recovery key.
Personally I chose Save to a file. Click Save to a file and save this file where you want to save. In feature this file will help you if you forget your BitLocker password. Click Save and click Yes. Click Next and Next. Now click Start Encrypting. Now will start BitLocker Drive Encryption. This process take some times, wait until it finished. After finishing this process your job is done.

Now enjoy yourself ÉÉÉÉÉ


Video Of This Tutorial:

If you like this article and if you think this tricks is helpful, please share this with your friends or share any social media.


Thanks to all of my friends,
Md. Manjurul Islam (Rubel)


You may like also....
How To Install Microsoft .NET Framework On Windows 7
How To Enable .Net Framework On Windows 8/8.1
How To Create Password On Windows 8.1
How to backup/Import Microsoft Outlook Mail

Go to link Download

Read more »

Friday, January 13, 2017

PayPal Duplicate Your Money Leaked From Blackhat

PayPal Duplicate Your Money Leaked From Blackhat


So I have always theorized a way to duplicate PayPal money, im not sure if this has been shared, but I figured Id share how you can do it it for the hey hell why not of it.


Requirements three paypals (Make sure theyre not going to get limited the second they receive some money -.-)

A good VPN

A legit paypal with Money to duplicate.


Step 1. Make 2 PayPals under a VPN (Or just one if you have a friend you want to experiment with. YOUR FRIEND MUST HAVE A DIFFERENT IP).

Lets pretend you have a friend who has a PayPal, instead of making two paypals.

Step 2. After making the VPN PayPal, take the money from your real (NON VPN) account and send it over to the VPN PayPal, like youre buying something like a product.

Step 3. Go onto the VPN account and send over the funds to your Friends paypal.

Step 4. If all of that is successful, wait about a day or two, and open up a case on your main account (You need to wait so that it at least looks legit) against the VPN account, like youve been "Scammed", write up some bullshit story on how you got scammed.

Step 5. Go onto your VPN account, and accept the chargeback.

Step 6. Now, the VPN account will have a negative balance, but both you, and your friends paypal (Or your second paypal, that you also made under a VPN) will have the same amount of money.

Thus your money has been duplicated, please dont abuse this, if youre going to do this, hide your ass to avoid all risk.


Go to link Download

Read more »

Tuesday, January 3, 2017

How To Save Your Facebook Account From Hackers

How To Save Your Facebook Account From Hackers


How To Save Your Facebook Account From Hackers


Watch Video and Share With Your Friends.

How To Save Your Facebook Account From Hackers by MastiComputer


Go to link Download

Read more »

Sunday, January 1, 2017

How to Reset Your browerser setting into Default settings Urdu

How to Reset Your browerser setting into Default settings Urdu


How to Reset Your browerser setting into Default settings Urdu


Watch Video and Share With Your Friends.
How to Reset Your browerser setting into... by MastiComputer


How to Reset Your browerser setting into Default settings Urdu Powered By Masti Computer and More Computer Trips&Tricks,Free Software ,Computer Course Like Our Facebook Page.

Go to link Download

Read more »

Thursday, December 22, 2016

How to Recover Your Windows 8 7 Product Key on Lenovo Laptop

How to Recover Your Windows 8 7 Product Key on Lenovo Laptop


I have ever installed Windows 7 and Windows 8 on my Lenovo laptop, and now I want to reinstall them because I want to get fresh Windows system. But unfortunately, I couldnÕt find Windows 7 and Windows 8 product key on my computer or other places. How can I find Windows 8/7 product key easily and quickly?

The easiest way probably is to recover Windows 8/7 product key with product key finder. Product key finder tool reads Windows registry file and load Windows cd-key from it. With product key finder, forgotten or lost product keys could be found out instantly. While if you find keys by yourself, more time would probably be wasted or Windows product key could not be found at last. But with Product Key Finder tool, the installation or activation keys of programs Microsoft Office, IE, SQL Server etc would be found too. 

Start to recover Windows product key on Lenovo laptop following the below steps and introduction.

Step 1: Download and install iSunshare product key finder.

Search ÒiSunshare product key finderÓ in the Google search box. You would find it appearing in the first place of results. Open it and download product key finder trial version.

Double-click to install it on your Lenovo laptop. But we have to notice that the trial version only finds part of product key for Windows 8/7. If we want to see all of product keys, full version is necessary.

download isunshare product key finder

Step 2: Run it and recover product key

Run product key finder on Lenovo laptop, click ÒStart RecoveryÓ to recover product key for Windows 8/7 and other programs.

Few seconds later, all the product keys will be listed in the software window, including Windows 8/7. But only part of them will be found if you use product key finder trial version.

find windows 8 or 7 product key

Step 3: Save Windows 8/7 product key

After Windows and other software product keys are found, you can click ÒSave to FileÓ or ÒSaveÓ button to make a backup for them. Keep it stored safely and you will find it afterwards when you want it.

Taking Product Key Finder, Only with three steps, actually two steps, you will find out product key for Windows 8/7 and other programs.

Related posts:
  1. How to Recover Windows Server 2012 Product Key
  2. How to Find Windows Server 2008 R2 Product Key
  3. Lost MS Word 2010 Product Key -  How to Recover
  4. Office 2013 Product Key Finder

Go to link Download

Read more »

Tuesday, December 20, 2016

How To Speed Up Your Internet Connection Iin Urdu Masti Computer

How To Speed Up Your Internet Connection Iin Urdu Masti Computer


How To Speed Up Your Internet Connection Iin Urdu | Masti Computer


Watch Video and Share With Your Friends.


Go to link Download

Read more »

Tuesday, December 6, 2016

6 Tips on How to Protect Your iPhone Data Safe

6 Tips on How to Protect Your iPhone Data Safe


The higher value and more popular the device is, the more dangerous it will be. To some extent, the popularity and high value of iPhone result in the possibility of iPhone stolen or lost. When iPhone is stolen or lost, data on iPhone will be used by others casually if they are not protected with any measures.

So is there any ways or tips to protect iPhone we can do by ourselves? Surely there is, please follow these tips below to keep iPhone data safe.

Tip 1: Create a Complicated Passcode


In iOS 4 and lower version, probably you can only create digital passcode. However, when you are using iOS 4 or supper version, more complicated passcode can be created. For example, alphanumeric password consists of numbers, alpha lower or upper case characters or other characters.

Go to Settings Ð General Ð Touch ID & Passcode, and turn off "Simple Passcode". Type in your iPhone existing passcode now and set a new password for iPhone access.

create a new complicated password for iPhone

Tip 2: Use Touch ID If Possible

create Touch ID for iPhone

Touch ID is available in iPhone 6 Plus, 6, 5s and iPad Air 2, iPad Mini 3. It is a new and special way to access iPhone with only your fingerprint. If your iPhone is one of these versions, make full use of it. It can bring you more convenient access to iPhone, and get rid of other people using it. Now you just need to create a Touch ID account.


Tip 3: Turn Find My iPhone on


Find My iPhone is free service for iPhone users to locate lost iPhone and can delete all data and settings on this iPhone.

Therefore, before unfortunate things happen, turn on Find My iPhone is necessary in Settings Ð iCloud with Apple ID.

turn Find My iPhone on

But this still cannot promise that you can successfully erase iPhone remotely when iPhone is in other peopleÕs hand. Because deleting iPhone data remotely asks for internet connection, and as long as Control Center appearing on lockscreen, another person can disable internet connection.

So when you turn Find My iPhone on, please prevent Control Center from appearing on the top of lockscreen.

Go to Settings Ð Control Center , Turn off Access on Lock Screen.


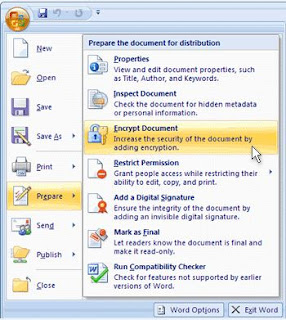
Tip 4: Encrypt Backup When Sync iPhone to Computer


Why we have to encrypt backup when sync iPhone to computer?

If we have set iPhone synced to computer, iPhone backup will be created automatically when it is connected to computer. However, if we do not encrypt iPhone backup, anyone can access this computer, and easily use this backup without any difficulties. As a result, your iPhone data can be seen clearly in other peopleÕs iPhone.

And if you dont want it happen, just check "Encrypt iPhone backup" or "Encrypt local backup" box in iTunes before you sync iPhone to computer.

encrypt iPhone backup when sync

Tip 5: Disable Siri Access from Lockscreen


turn off Siri from lockscreenEven though you have made alphanumeric password, Touch ID and Find My iPhone enable, made Control Center disable, people still can access iPhone lockscreen by Siri. 

So please disable Siri access from Lockscreen.

Go to Settings Ð General Ð Touch ID and Passcode, type your passcode and click Done. Toggle off Siri under the "Allow Access When Locked" section.

While youre at it, you can also toggle off Passbook access to make sure no one can get to your sensitive information without first unlocking your iPhone.

Tip 6: DonÕt Jailbreak your iPhone


Surely jailbreaking iPhone allows you to customize your iPhone in ways not approved by Apple and install apps that have been rejected in the official App Store. But if you want your iPhone to be secure as possible, stay far away from jailbreaking.

Actually, Apple has designed the secure operating system that runs on the iPhone. If there is no accident, no viruses, malware, or other software-based security threats iPhone like PCs and Android phones. The only viruses that have struck iPhones have targeted jailbroken devices. So, for the security of iPhone, donÕt jailbreaking.

Even though all these settings cannot protect iPhone from using when it is stolen or lost, they are enough for iPhone users to protect their iPhone. 

Related Articles: 
  • Encrypt iTunes Backup | iTunes Backup Password Recovery Tips
  • How to Factory Reset iPad with or without iTunes
  • Three Ways to Hard Reset iPhone with or without Passcode
  • Locked out of iOS 7/8 after Forgot iPhone Passcode


Go to link Download

Read more »

Monday, November 7, 2016

How to automatically shutdown your PC after specific time using CMD

How to automatically shutdown your PC after specific time using CMD


W


Automatically-Shutdown-your-Computer-after-specific-time-using-Windows-Command-Prompt1
You do not need a third party software to automatically shutdown your pc after specific time, because you can schedule your system shutdown using the command prompt. The SHUTDOWN command does everthing. The command can be used to shutdown, restart, logoff and hibernate your local computer or a remote PC connected to your network. HereÕs a quick guide on How to automatically shutdown your PC after specific time using CMD.

How to schedule system shutdown

1. Open the ÒcmdÓ window, to open the command prompt, press Win key + R, type cmd and hitEnter 2. Now type the following command, the below command shuts down the computer after1800 seconds (30 minutes)
Shutdown /s /t 1800 РThis command will shut down you computer in 30 minutes
Shutdown /s /f /t 1800 - This command will force shut down your computer in 30 minutes, which means all running applications will be closed without getting stuck on ÒDo you want to Force ShutdownÓ notification
Auto-Shutdown-PC-using-CMD

Shutdown

shutdown is the common command to perform Shutdown, restart, logoff or hibernate operation

/s

/s Ð means, shutdown, other commands are listed below /r Ð restart /p Ð shutdown without a warning /h Ð hibernate /l Ð logoff /a Ð abort a scheduled shutdown

/t

/t command is used to set the timer.

Aborting a scheduled shutdown

If you want to cancel a scheduled shutdown you can type the following command in the cmd window shutdown /a

Go to link Download

Read more »

Monday, October 31, 2016

How To Hide A Drive From Your Computer Without Any Third party Software

How To Hide A Drive From Your Computer Without Any Third party Software


Hello friend!
How are you? Hope you are very well.  There are many software is available for hiding any local drive. But there are too expensive for us. Some people use crack /patch for that software but any crack/patch software is not reliable for us.

Anyway today I am going to show you a simple, easy and new way, how to hide any drive from your computer without any third-party software. If you want to hide your computerÕs drive just follow my bellow procedures.

Right click on my computer-->Click Manage--> Now will open a new wizard which name is Computer Management. From the left side click on Disk Management. Now from the right side chose any drive, which one you want to hide from your computer. Now right click on that --> then click on Change Drive Letter and PathsÉ--> Now you will see a new wizard and here is three options (Add, Change, Remove). Click the Remove button then click Yes. Close the Computer management wizard. Now go to my computer and see your one drive is vanished.

If you want to show your drive, right click on my computer --> Click Disk Management --> Now right click on that drive which one you have to hide. Click Change Drive Letter and PathsÉ --> Click Add --> Then click OK.  Now close the Computer management wizard and go to my computer and see your drive is there which one you hide before. Enjoy yourselfÉÉ.

Video Of  This Tutorial:
If you like this article and if you think these tricks are helpful, please share with your friends.

Thanks to all of my friends,

Md. Manjurul Islam (Rubel)

Go to link Download

Read more »